How to configure an Android phone using IMAP
Estimated Reading Time: 1 MinutesThis article explain show to configure an Android smartphone with an IMAP e-mail account. This process is simple and should only take a few minutes.
Â
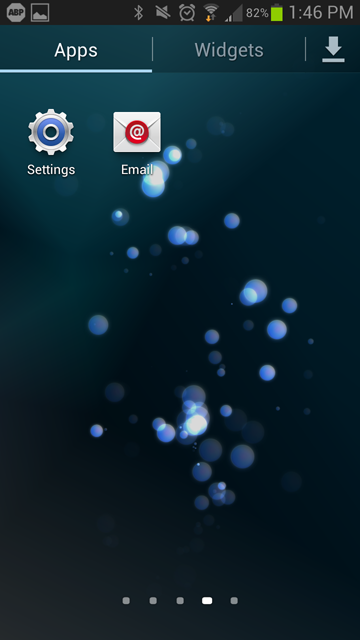
1. Open the "Email" application, accessible via the <spanstyle="font-weight: bold;"="">Apps menu from the home screen.
Â
Â
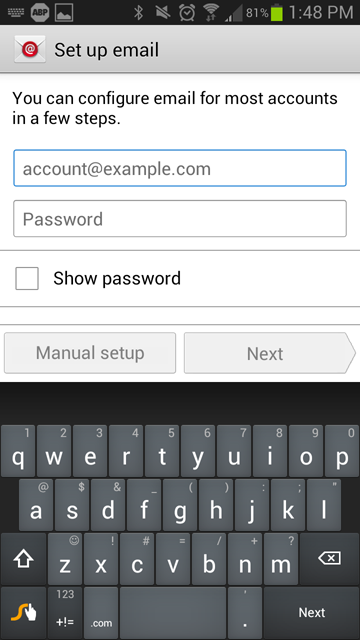
2. Once the "Email" app has opened, enter your full <spanstyle="font-weight: bold;"="">e-mail and password, then click Manual Setup.
Â
Â
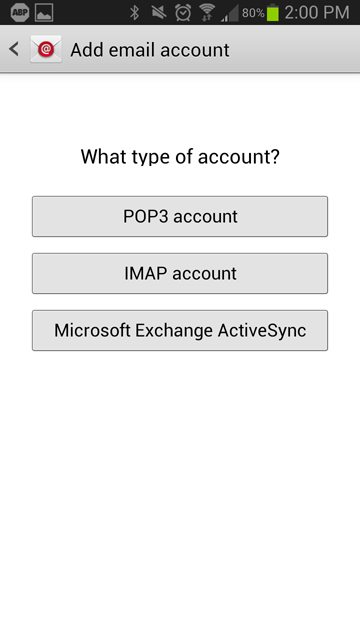
3. Choose IMAPÂ as the account type.
Â
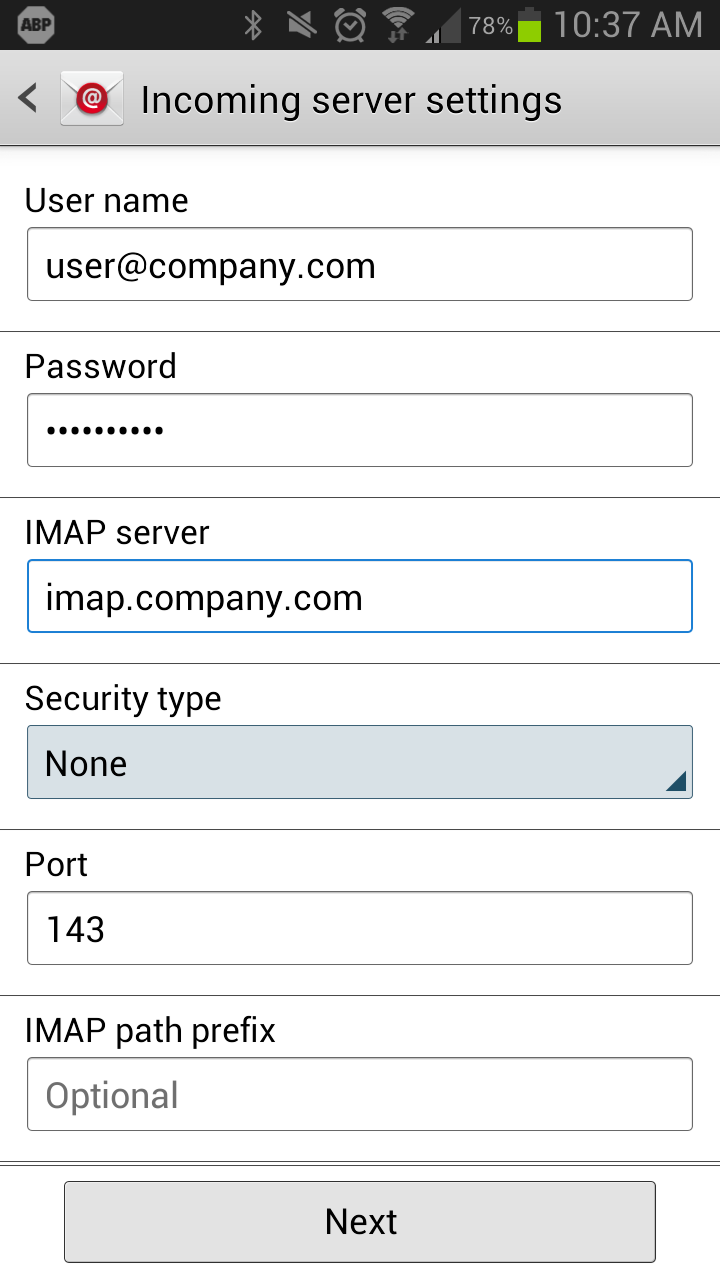
4. Fill out the settings completely as follows:
- User name: Your complete e-mail address.
- Password: Your password for the corresponding e-mail address.
- IMAP Server: imap.COMPANY.COM
(COMPANY.COM should be replaced with the portion of your e-mail address following the "@" symbol. Example: if your e-mail address is HanSolo@MFalcon.biz, then your IMAP server should be imap.MFalcon.biz) - Security Type: None
- Port: 143
- IMAP path prefix: Leave Blank
When finished, click next.
Â
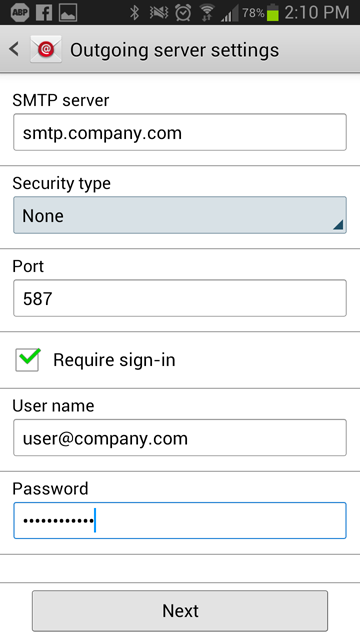
5. Fill out the settings completely as follows:
- SMTP Server: smtp.COMPANY.COM
(COMPANY.COM should be replaced with the portion of your e-mail address following the "@" symbol. Example: if your e-mail address is HanSolo@MFalcon.biz, then your POP3 server should be pop3.MFalcon.biz) - Security type: None
- Port: 587
- User name: Your complete e-mail address.
- Password: Your password for the corresponding e-mail address.
When finished, click next.
Â
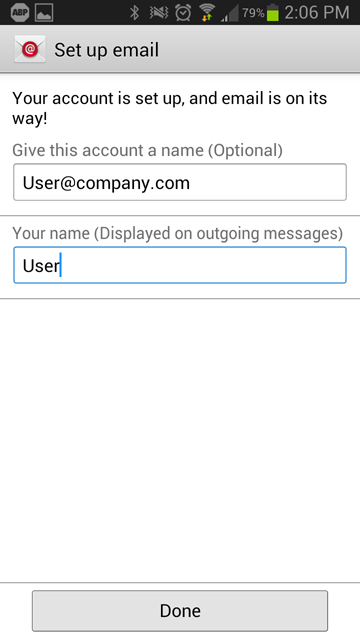
6. Fill out the remaining fields to your preference. Once filled out, you can now select "Done" and verify that you are receiving e-mails.
Â