How to Recover Deleted Emails in Office 365
Estimated Reading Time: 6 MinutesHow to Recover Deleted Emails in Office 365
|
In Office 365, there are two ways a deleted email can be recovered. The first one involves users who can recover deleted emails by themselves using built-in recovery options. The second option requires some help from an administrator to search for a deleted email using eDiscovery. Below you will find instructions on how to proceed in either way: 1. Recover deleted emails in Office 365 – user’s instruction. 2. Recover deleted emails in Office 365 – admin’s instruction. |
||
|
1. Recover deleted emails in Office 365 – User’s Instruction. In many cases, users can recover a deleted email by themselves within their Office 365 account. Once a user has noticed that they accidentally deleted an email, he or she can restore it directly from the Deleted Items folder. If the email was e.g. hard deleted (using a Shift+Delete key combination) or removed from the Deleted Items folder by a user or a retention policy, it needs to be recovered from the Recoverable Items folder. Follow the steps below to recover deleted items from the Deleted Items folder or Recoverable Items folder:
|
||
|
Step # |
Task |
Screenshot |
|
1 |
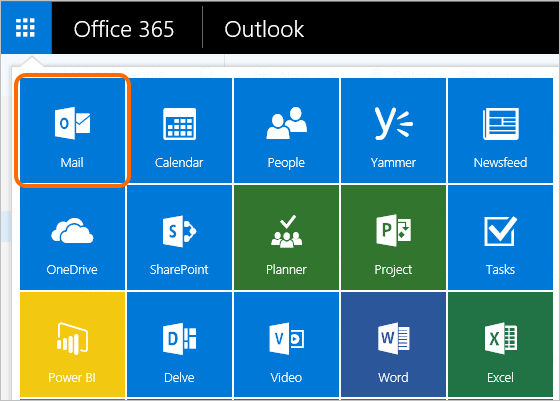
In your Office 365 account, go to the Mail app. |
|
|
2 |
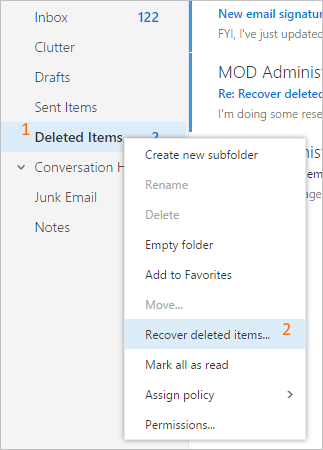
On the left folder pane, go to the Deleted Items folder and click on it. |
|
|
3 |
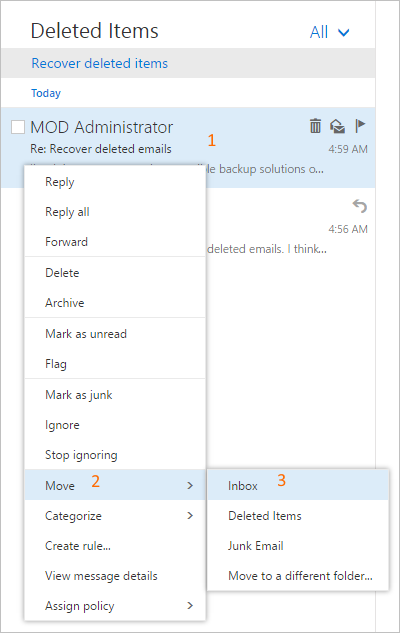
In the Deleted Items folder, find the message you want to restore and right-click on it. In the resulting window, extend the Move option and select Inbox (or Move to a different folder… if you want to move that email to a different location). |
|
|
4 |
Now, the deleted email should be moved back to your Inbox.
|
|
|
But what if a deleted email is not present in the Deleted Items folder anymore? Then, you can search for that email in the Recoverable Items folder.
|
||
|
1 |
In your Office 365 account, go to the Mail app. |
|
|
2 |
Now, on the left folder pane, go to the Deleted Items folder, right-click on the folder, and select the Recover deleted items option. |
or, if you are already in the Deleted folder, click the link "Recover deleted items" on top of a deleted-email list.
|
|
3 |
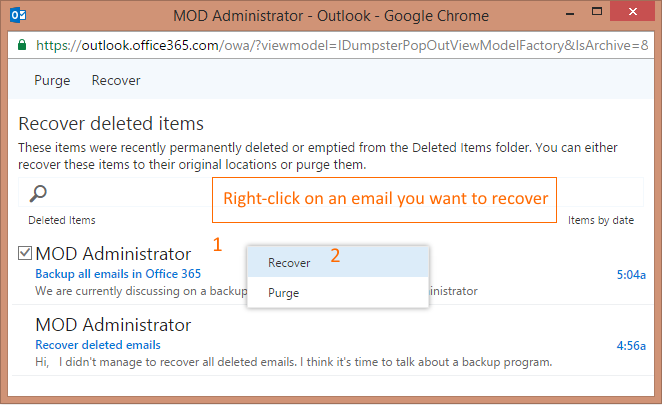
In the resulting window, find an email you want to recover, right-click on it, and then click "Recover." |
|
|
4 |
If you need to recover more emails at once, you can select them by checking a checkbox next to each email (you need to hover over an email to see the checkbox). When emails have been selected, click the "Recover" button located on top of the window. |
|
|
5 |
All selected emails should appear in the Inbox folder. |
|
|
There also might be a situation when a user cannot find a deleted email in thie Office 265 mailbox. If that is the case, a user will probably ask you to recover missing emails. 2. Recover deleted items in Office 365 - Instruction for Administrators If a user was not able to recover deleted emails from their Office 265 mailbox, you can do it directly in Exchange Online using the In-Place eDiscovery & Hold option (you have to be a global administrator in Office 365 to proceed). To recover deleted emails, follow the step below: Important: You can recover emails only if they had not been purged from the user’s mailbox. In other words, you can recover deleted emails if they are still available in the Recoverable Items folder. If they’re not, you will not recover those emails.
|
||
| 1. |
Before you will be able to follow this procedure, make sure you have sufficient rights to perform eDiscovery search. To check that:
|
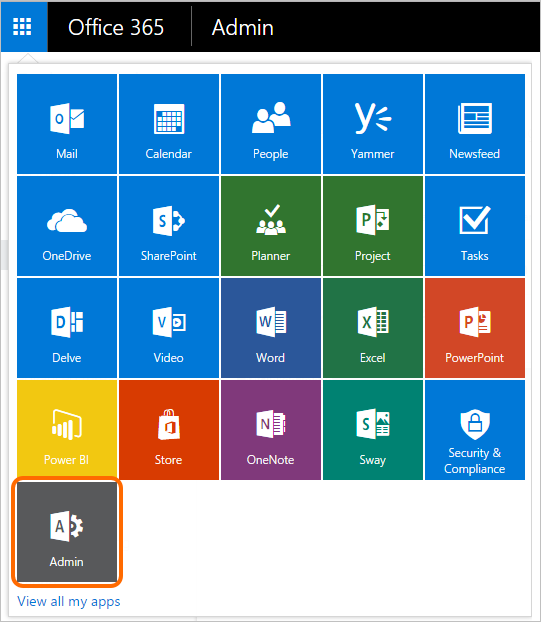
a. Log in to your Office 365 account and go to the app view. Click the Admin app.
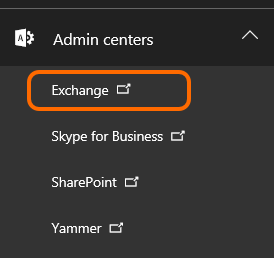
b. On the left pane, extend Admin center and click on "Exchange" to open Exchange admin center.
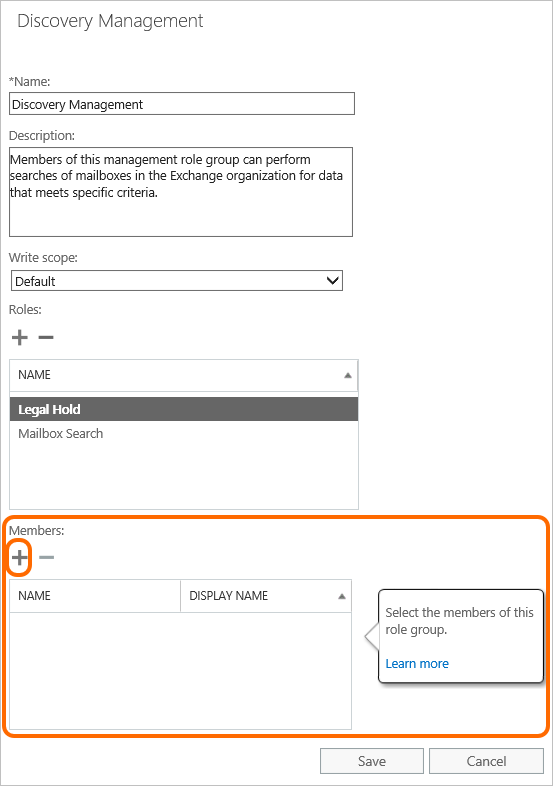
c. Then, go to Permissions > Admin roles. From the list of roles, select Discovery Management and click the Pencil icon to edit that role.
e. Now, sign out and sign in again to Office 365, so changes take effect. |
| 2 |
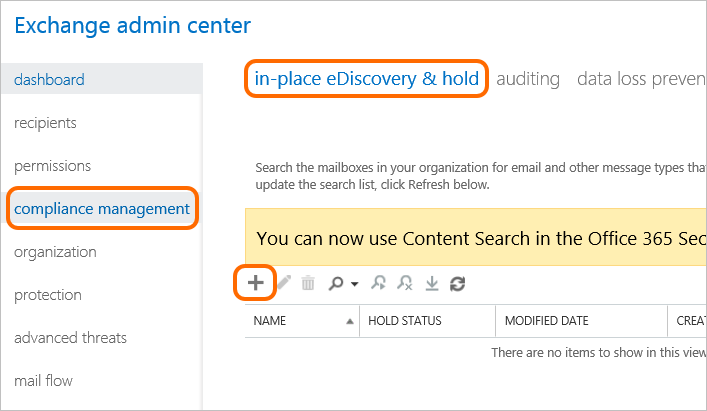
Once you have assigned permissions to yourself, go to the Compliance Management section and then In-Place eDiscovery & Hold. Click on the Plus icon to create a new search. |
 |
| 3 |
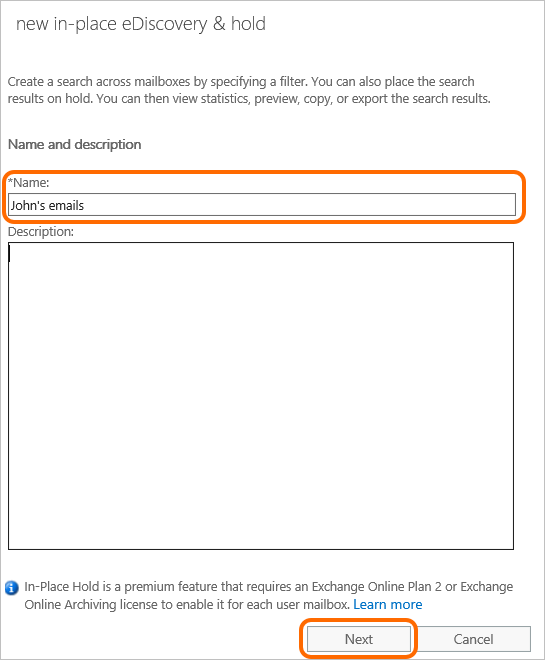
Provide a name for your search and, optionally, a description. Click "Next." |
 |
| 4 |
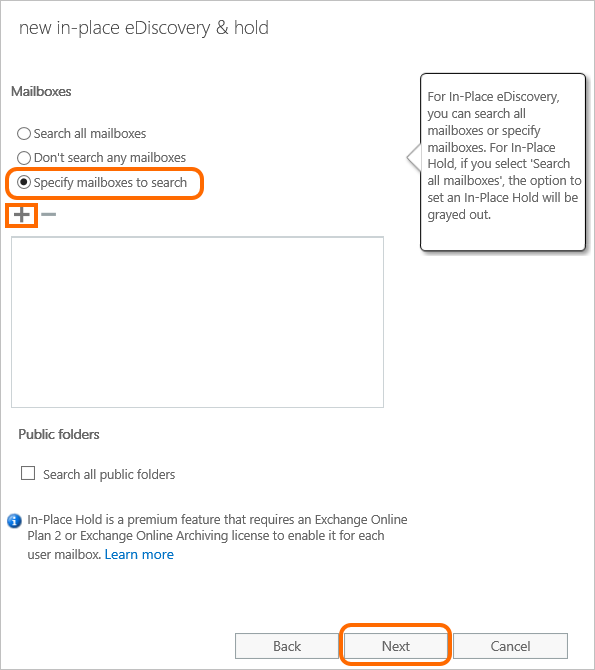
Now, you can choose a mailbox that you want to search. To do that, select the Specify mailboxes to search option, and then click on the Plus icon to add a mailbox. Click Next, once you have added it. |
 |
| 5 |
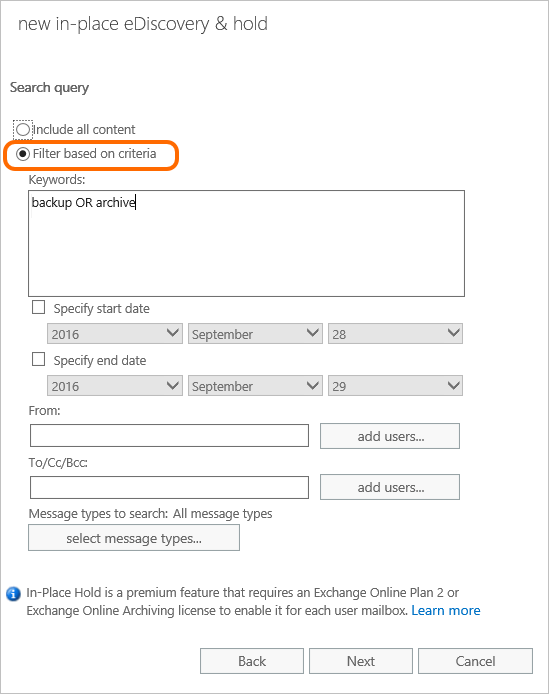
The next step to specify criteria for a search query. To do that, click the Filter based on criteria option, and adjust search options to your needs. Note: When you need to provide more than just one keyword in a search query, remember to separate them with OR and AND, not commas! |
 |
| 6 |
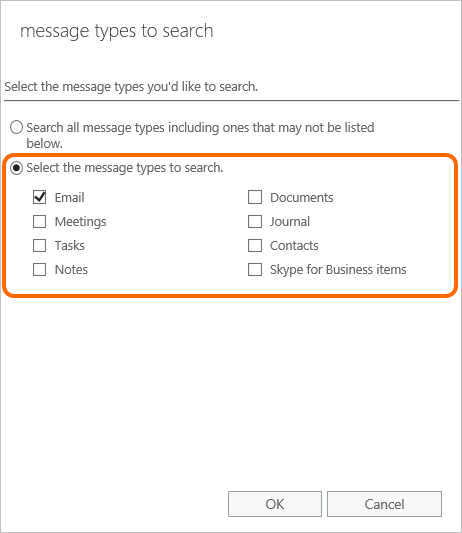
In the same window, click on the "Select message types..." button to narrow down the search to emails. A new window will open. Click "Select the message types to search." and tick a checkbox next to Email. Click "OK." |
 |
| 7 |
Once you adjusted the search query to your needs, click "Next." |
|
| 8 |
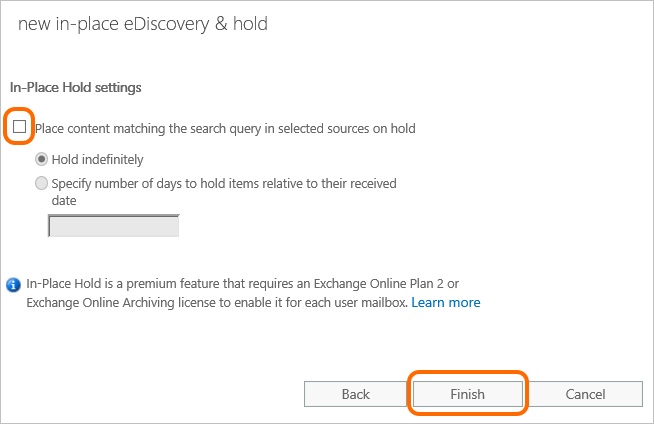
In the In-Place Hold settings page, click "Finish" without checking any checkbox as we do not want to place content on hold. |
 |
| 9 |
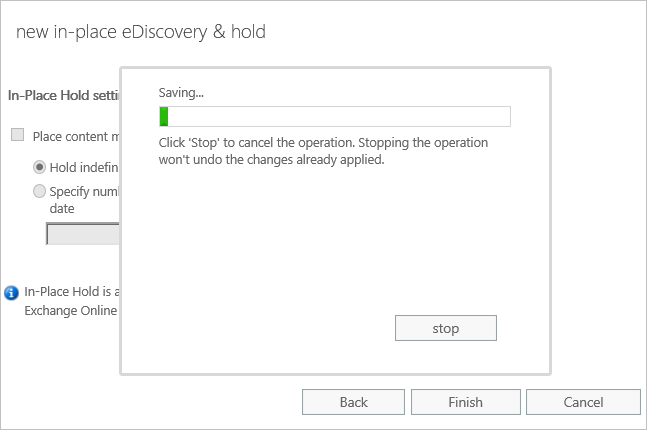
Now, your settings will be saved. Once the process is completed, click "Close." |
 |
| 10 |
Go back to the In-Place eDiscovery & Hold tab, click your newly created search and click on the Export to a PST file icon. |
 |
| 11 |
If an installation window appears, click "Run" to install the eDiscovery Export Tool application. |
 |
| 12 |
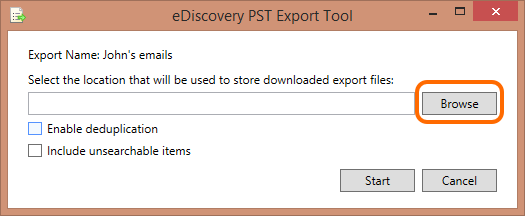
In the eDiscovery PST Export Tool window, select a location for your PST file using the "Browse" button. Leave the options Enable deduplication and Include unsearchable items unchecked. |
 |
| 13 |
After selecting a location for the PST file, click "Start" to download the file to your computer. If you are asked to provide your Discovery Export Credentials, enter them and click "OK". Once the process is completed, go to the location where the file is saved. |
 |
| 14 |
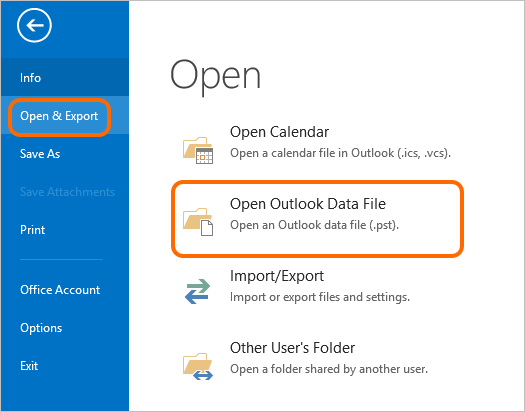
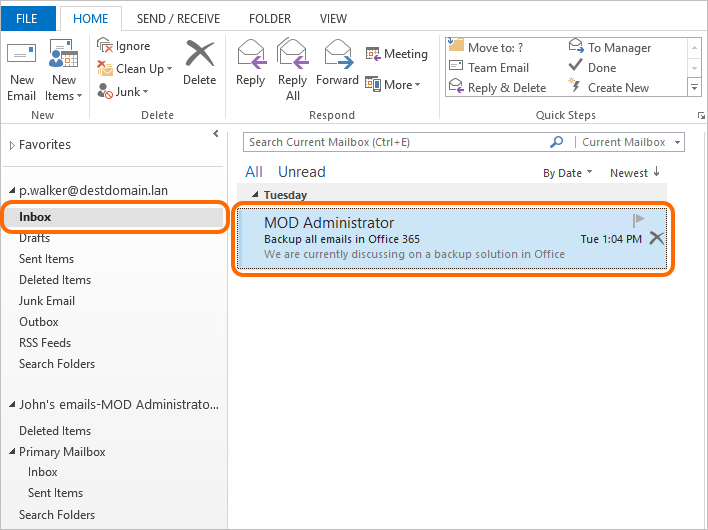
Now, it’s time to open recovered emails from the PST file in a user’s mailbox. To complete this step, you can either advise a user on how to do it or import the file yourself. To proceed, you need a desktop version of Outlook as Outlook on the Web and Outlook Web App does not open PST files. To start, open your Outlook, and go to the File tab. Then, click Open & Export > Open Outlook Data File. |
 |
| 15 |
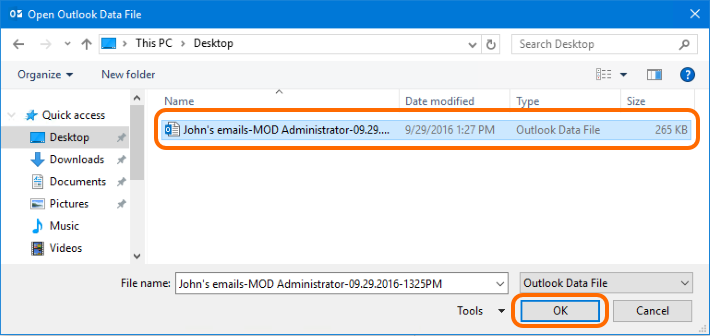
In the resulting window, search for the PST file that contains recovered emails, select it, and click "OK." |
 |
| 16 |
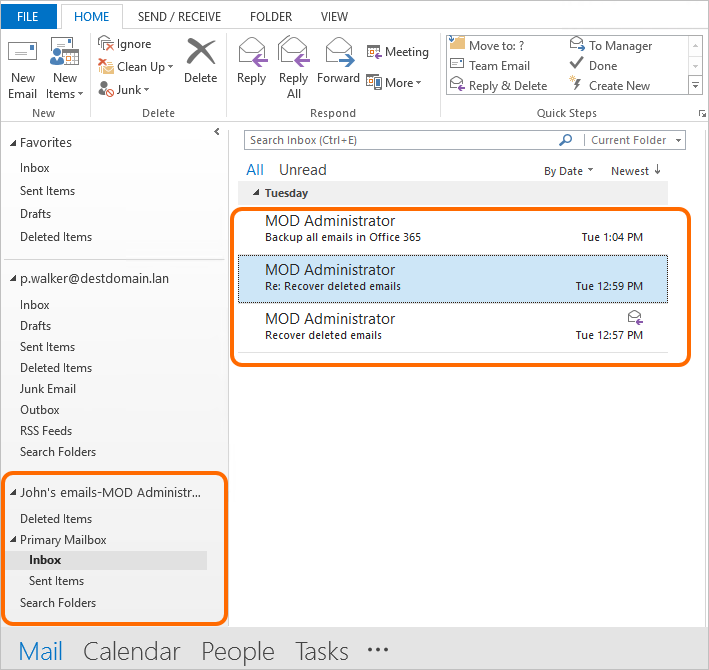
Now, you should see a new folder tree in your Outlook. Expand that new PST file using the arrow, and click on the folder from which you want to recover emails. In my example, it is the Inbox folder. |
 |
| 17 |
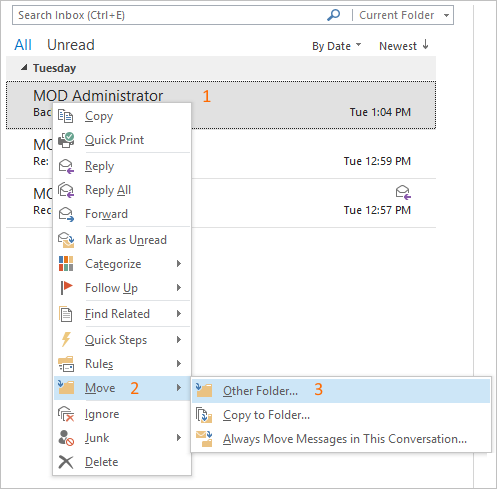
To recover a selected email, right-click on it and then click Move > Other folder... |
 |
| 18 |
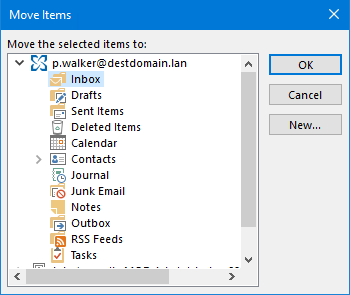
Select a folder and click "OK." |
 |
| 19 |
A deleted email should appear back in your Outlook personal folder. |
 |
