How to configure a Windows phone using IMAP
This article explain show to configure a Windows phone with an IMAP e-mail account. This process is simple and should only take a few minutes.
Â
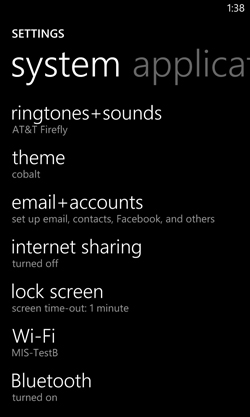
1. From the home screen, go to the "Settings" application.
Â
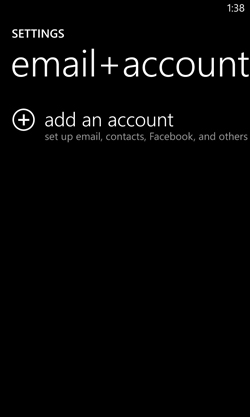
2. On the settings screen, tap "email+accounts".
Â
Â
3. Tap "add an account."
Â
Â
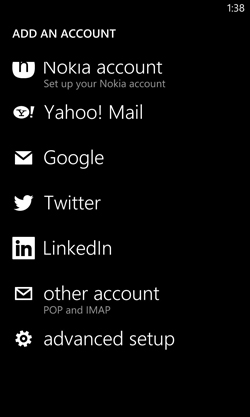
4. Scroll to the bottom of the screen and tap "advanced setup."
Â
Â
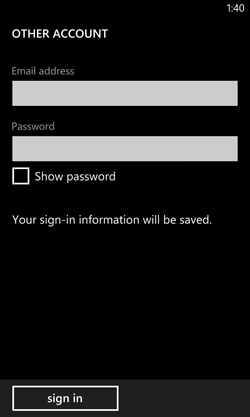
5. Fill out the E-mail Address and Password fields. Tap "sign in" when you are done.
Â
Â
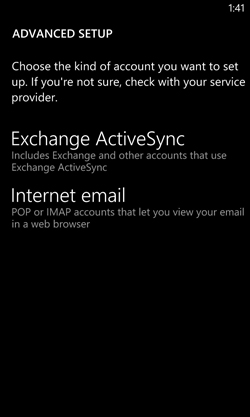
6. On the "Advanced Setup" screen, tap "Internet email."
Â
Â
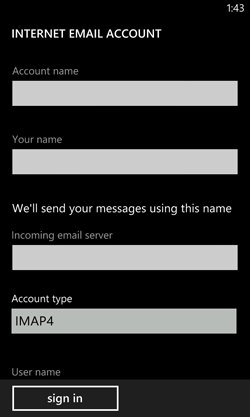
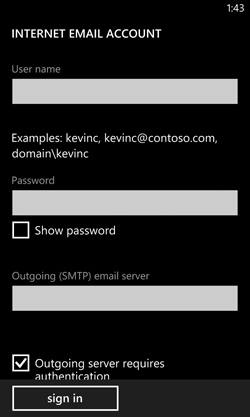
7. On the "Internet Email Account" screen, fill out the following information:
- Account name and Your name fields
- Incoming email server: imap.COMPANY.COM
(COMPANY.COM should be replaced with the portion of your e-mail address following the "@" symbol. Example: if your e-mail address is HanSolo@MFalcon.biz, then your IMAP server should be imap.MFalcon.biz)
- Account type: IMAP
- User name: Your complete e-mail address.
- Password: Your password for the corresponding e-mail address.
- Outgoing (SMTP) email server: smtp.COMPANY.COM
(COMPANY.COM should be replaced with the portion of your e-mail address following the "@" symbol. Example: if your e-mail address is HanSolo@MFalcon.biz, then your POP3 server should be pop3.MFalcon.biz)
- Outgoing server requires authentication: Checked
Â
Tap "sign in" when finished.
Article ID: 98
Created: January 7, 2013
Last Updated: August 18, 2014
Author: Natural Networks NOC [support@naturalnetworks.com]
Online URL: https://kb.naturalnetworks.com/article.php?id=98
