Step #
Task
Screenshot
1
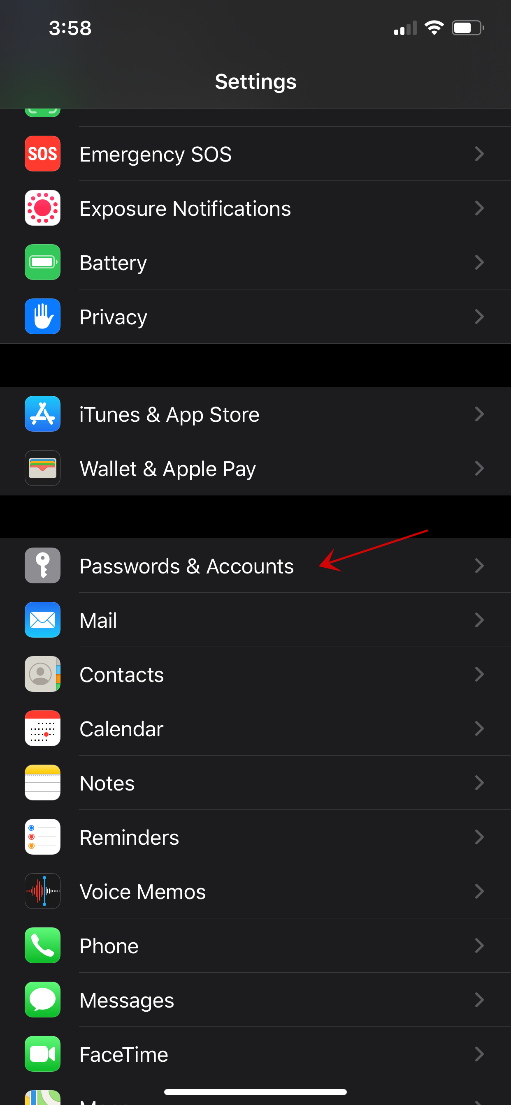
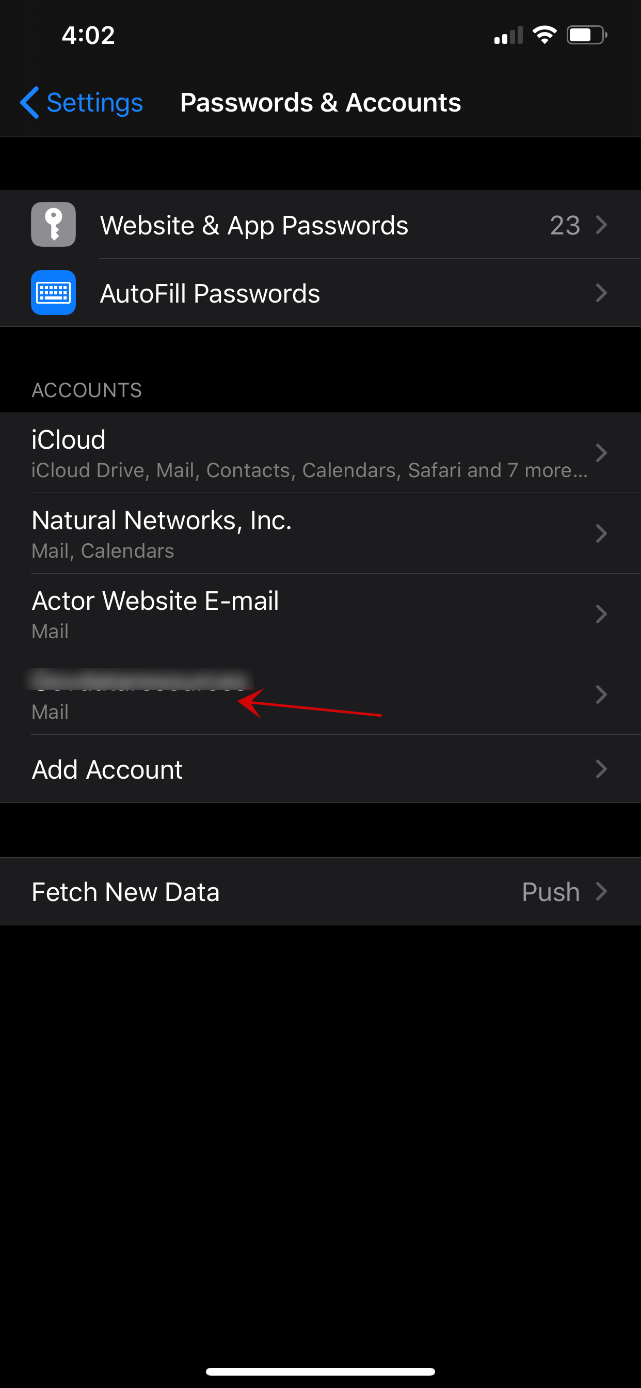
Navigate to settings on the device and scroll down to ‘Passwords & Accounts.’
2
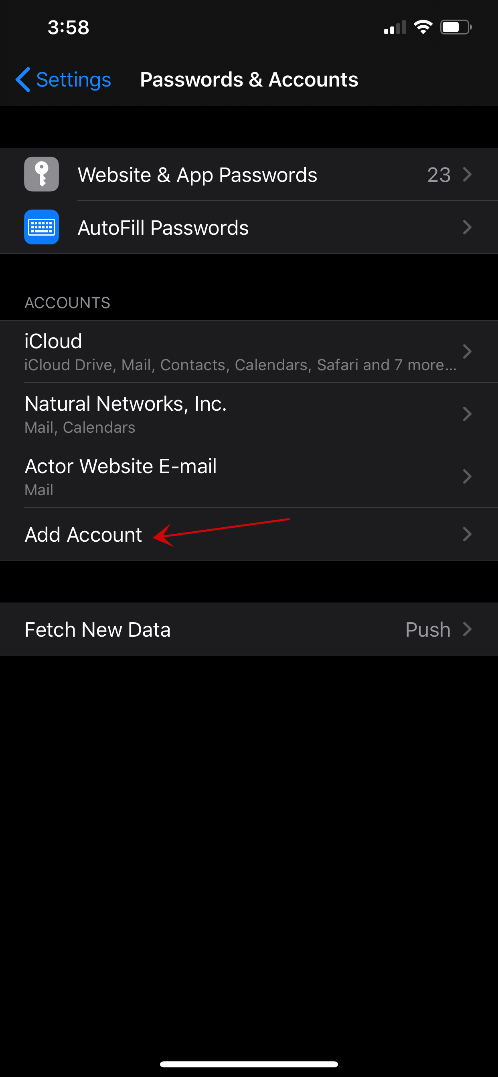
Once in ‘Passwords & Accounts’ click on ‘Add Account’
3
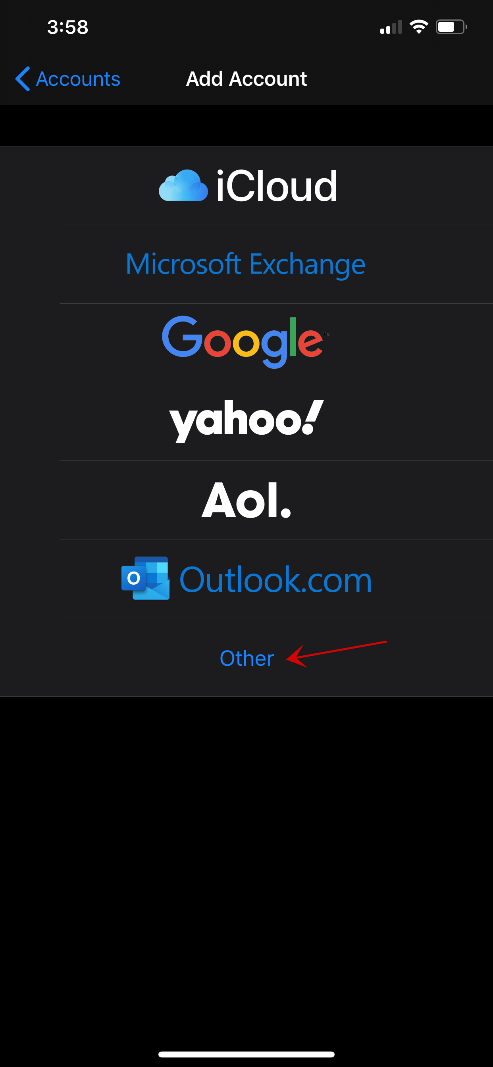
Pick type ‘Other’ when adding an account
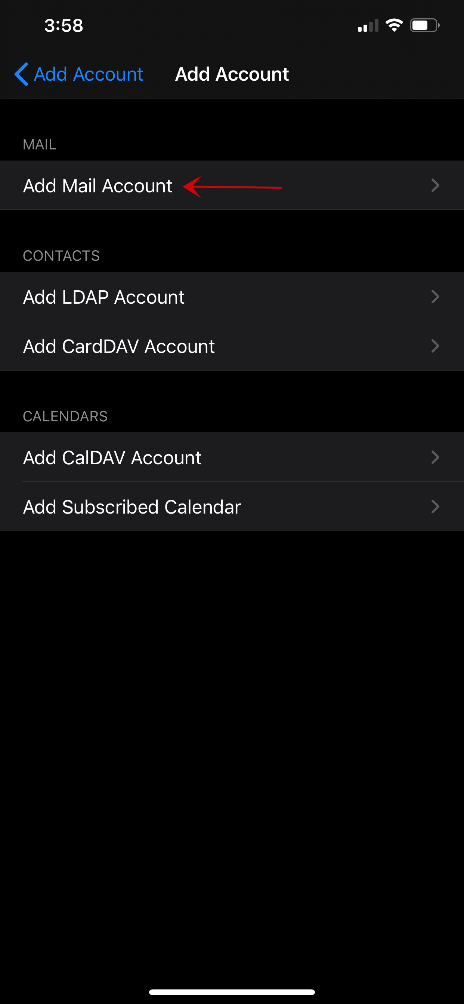
4
Select ‘Add Mail Account’
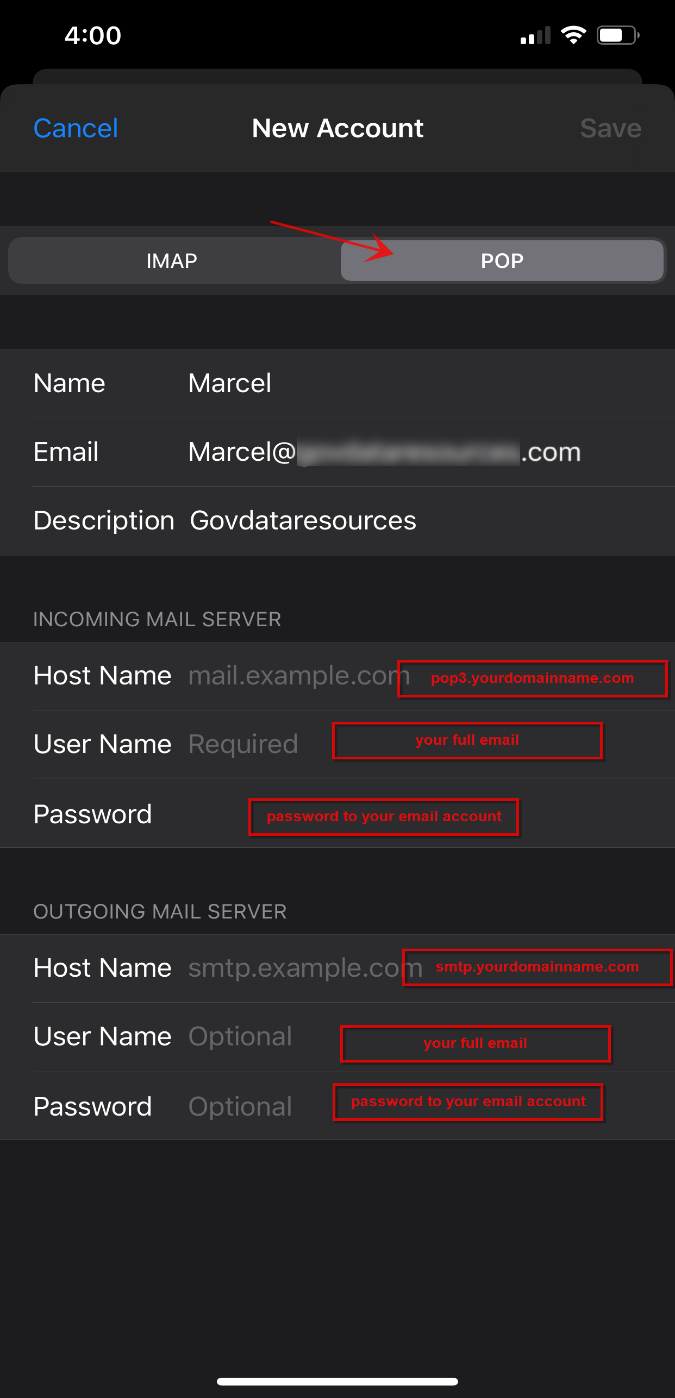
5
Make sure to select ‘POP’ from the top menu for this new account. Fill out the fields below with your own information as in the example to the right.
Where it states:
Hostname – incoming is ‘POP3.”yourdomain”.com’
Outgoing is ‘smtp.”yourdomain”.com’
Username – put your email address
Password – put the password to your email
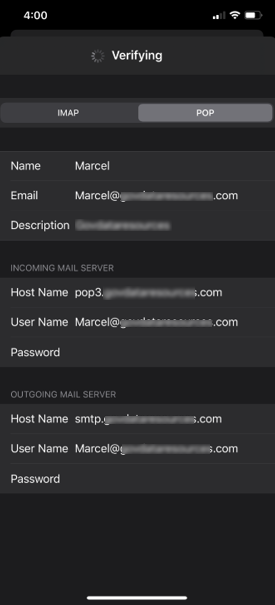
*NOTE - After hitting save it will buffer at ‘Verifying’ like the example in the far right. Just wait a minute or two until the next prompt comes up.
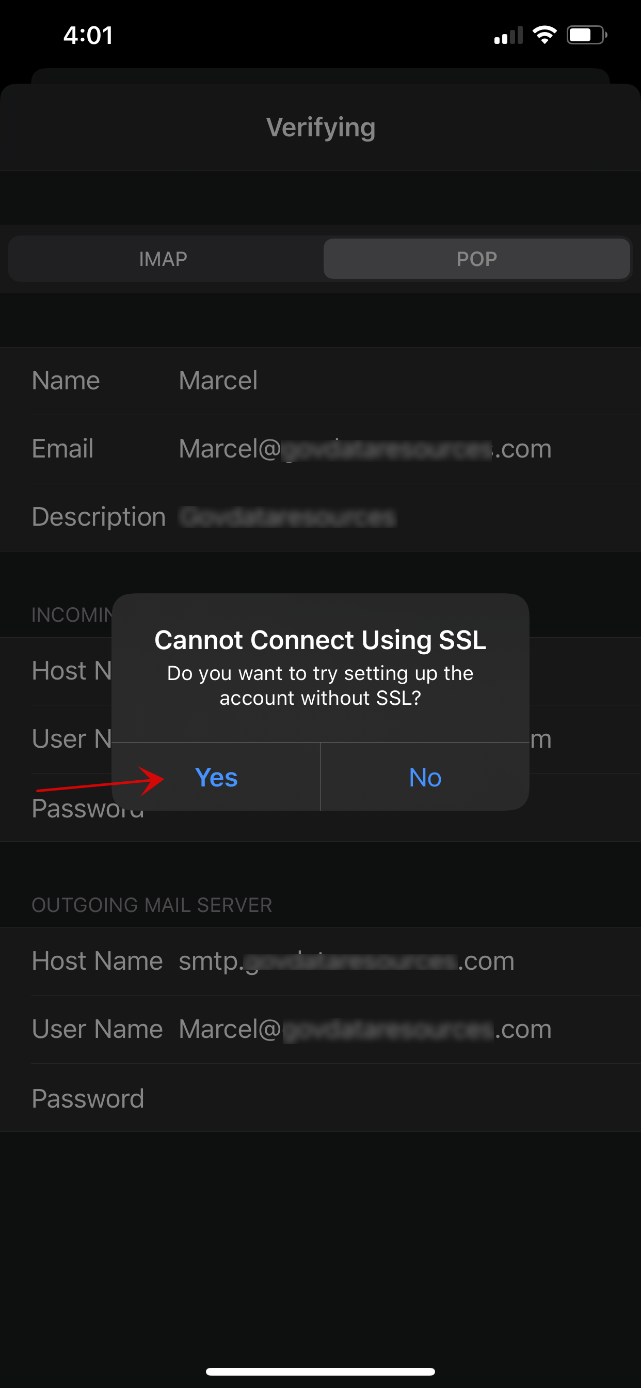
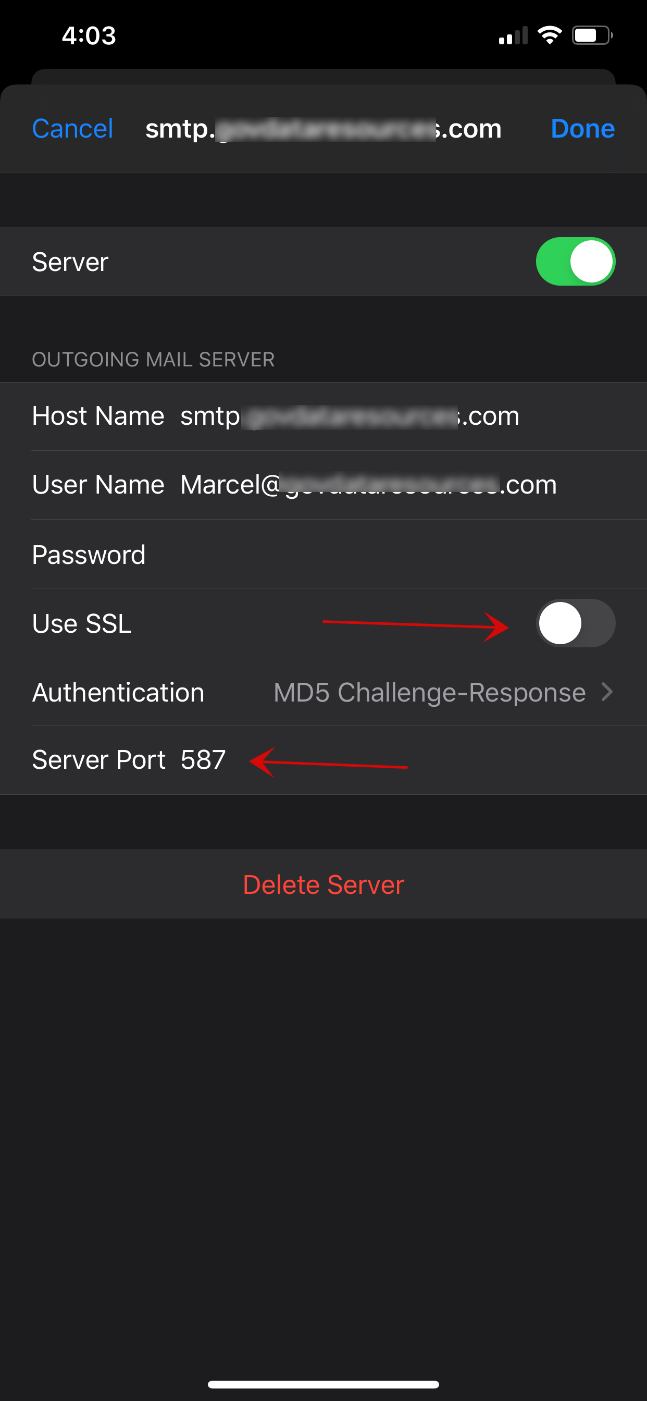
6
After verifying for a minute or two, you will be prompted to set up without SSL. Select ‘Yes’
7
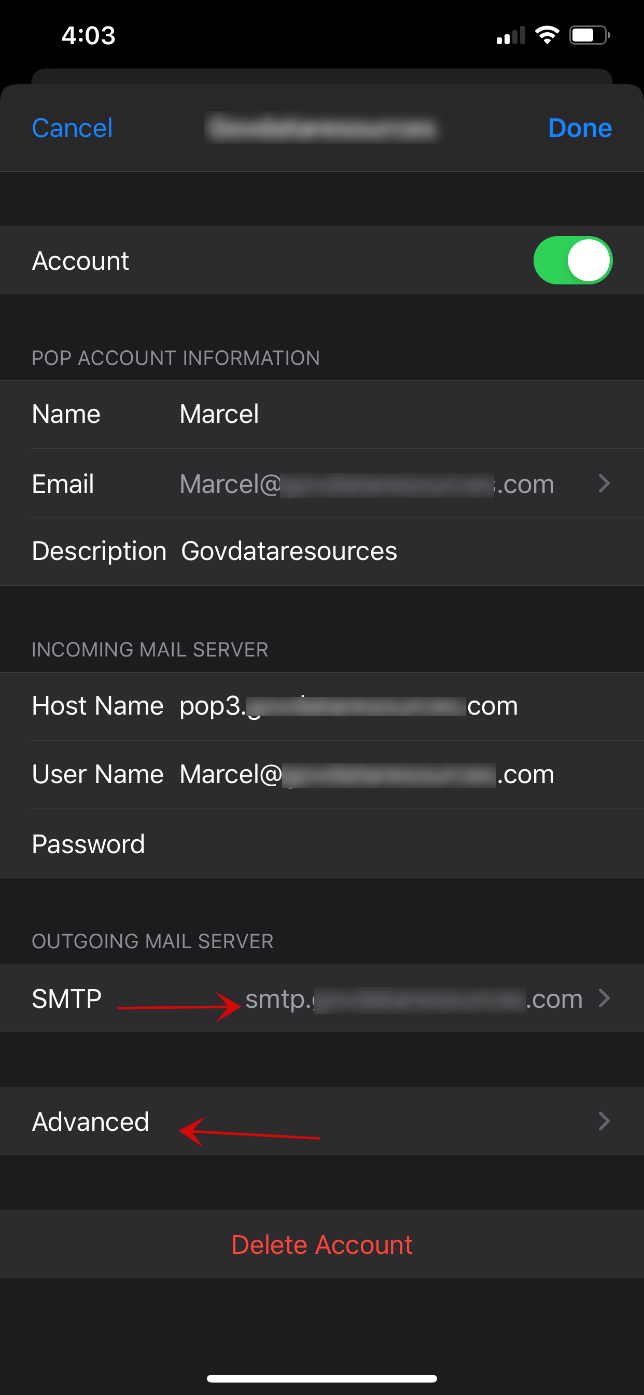
After that, the account will appear to have been added, but it will not work until we make some changes. Click back on the newly added email.
8
You will need to adjust settings in both ‘SMTP’ and under ‘Advanced’. First, we will work with Advanced.
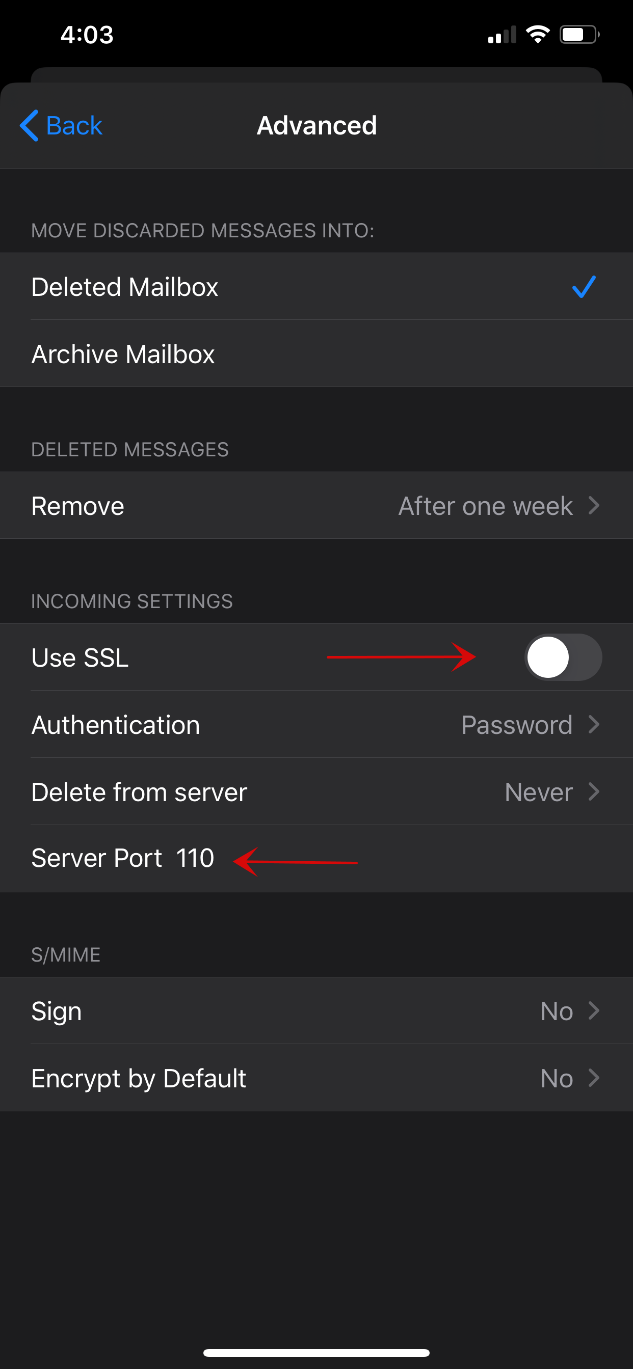
9
Under the Advanced menu, make sure that ‘Use SSL’ is turned off. Then verify and fix if needed the ‘Server Port’ it should be 110.
10
Now go back to the account page that we were at prior to going into ‘Advanced’ and we are going to navigate to ‘SMTP’.
Then click on ‘Primary Server’
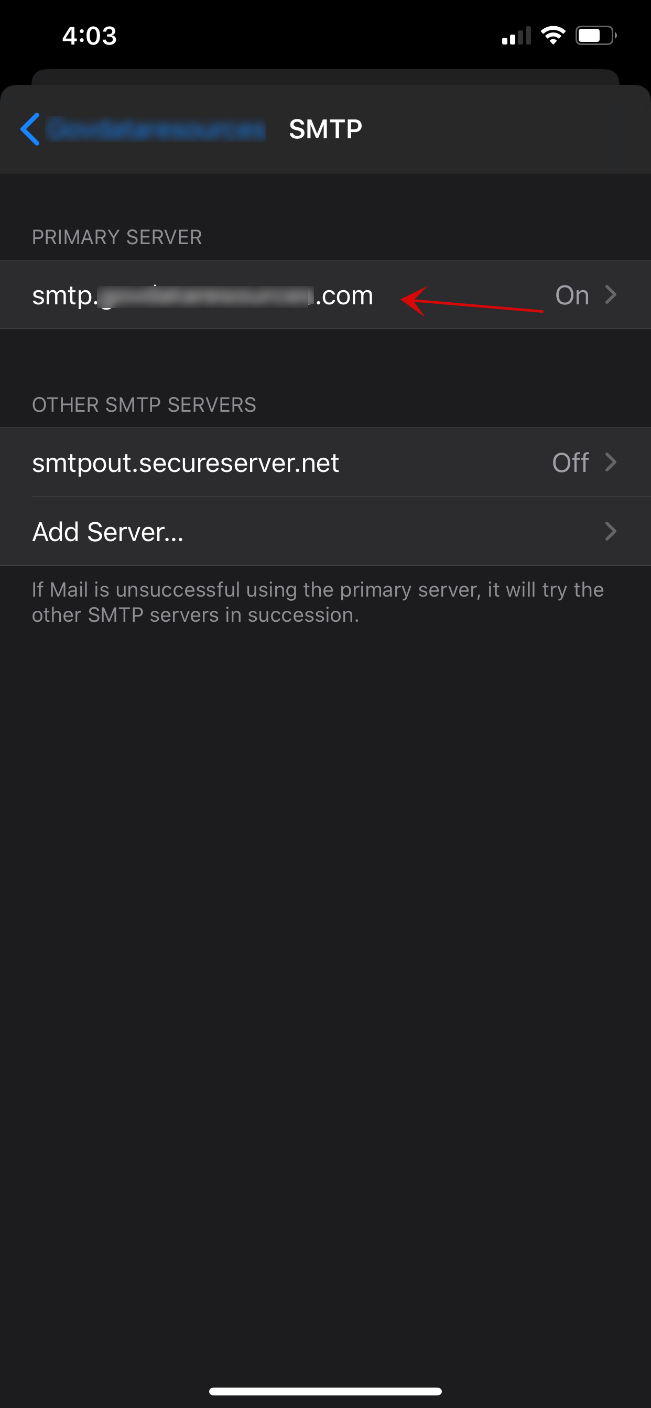
11
Now make changes again to ‘Use SSL’ and turn it off. Then verify and or change the ‘Server Port’ to 587.
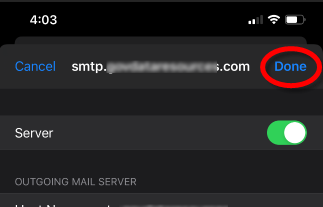
12
Now you can click Done at the top right of the screen. The email should be working now in the default iOS mail client.
If email is still not flowing in or not sending out, check and make sure that their public IP is not blacklisted.