Step #
Task
Screenshot
Initial Software Setup with Troubleshooting
1
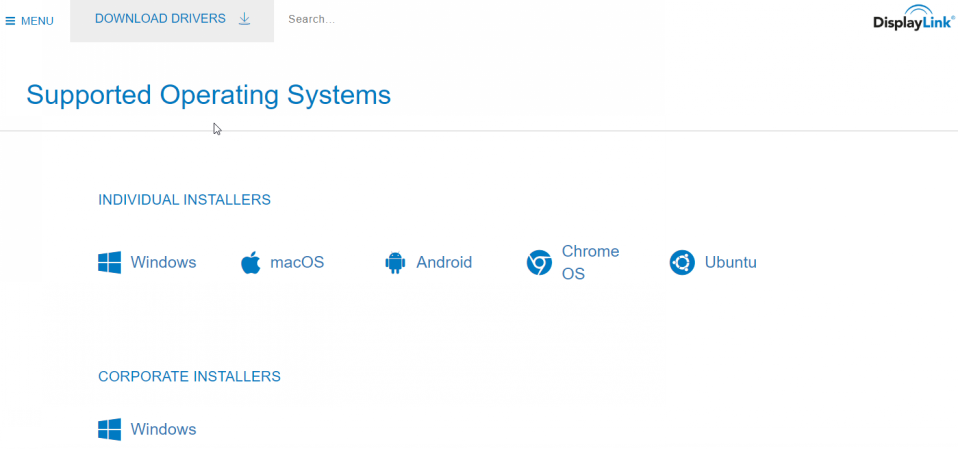
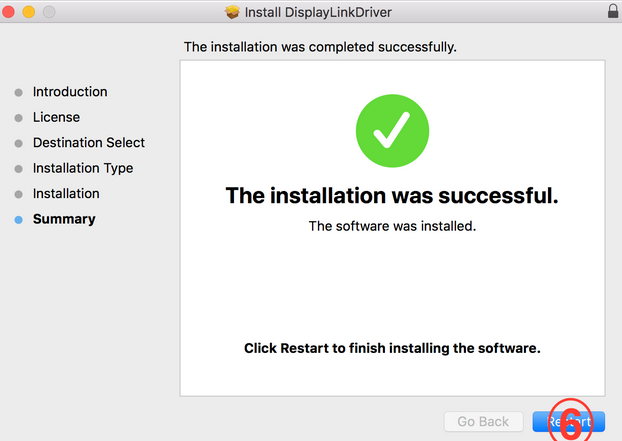
Download the DisplayLink driver - www.displaylink.com/downloads. Specify the Mac OSX operating system, then install the drivers.
*Note: Mac OS X, audio and Ethernet use the native Apple drivers in OS X. The drivers from DisplayLink cover video only.
If the DisplayLink product has stopped working or has never worked, it is most likely a hardware problem to be diagnosed.
Follow the steps below...
2
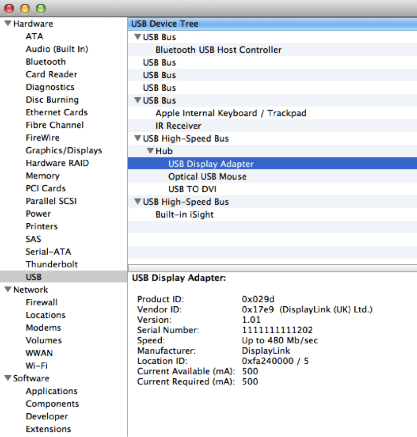
Verify that OS X has detected the device. This can be done by seeing if the device appears in the system report.
To do this:
- Choose “About this Mac” from the Apple Menu on the top left corner of your main screen.
- Click on “More Info…”
- On Lion and later: click on “System Report…”
- The System Information application will open.
- Select the USB information from the Hardware category as shown in the screenshot to the right.
- Locate M/Connect or a hub device made by DisplayLink. If no device is shown, try these steps:
3
If M/Connect or other hub device appears but still does not work, check the Product ID (PID) as described below:
• Device appears in the system report, but still does not work, then the Product ID (PID) should be checked to make sure the device has started up correctly.
• Click on M/Connect or other hub device made by DisplayLink in the system report to select it.
• The PID should be shown in the device properties. It will be a value like 0xXXXX, where XXXX can be any hexadecimal value.
• If the device is 8060 or 8080, then the device did not boot correctly.
• To recover the device:
- Unplug all cables
- Connect power (if needed)
- Connect USB cable
- Connect video cable
• If the device continues to appear with the same PID, consider replacing the dock.

4
If M/Connect or other hub device does not appear in the system report:
- Disconnect the M/Connect dock from the laptop.
- Uninstall the DisplayLink software.
- Repair the permissions (see below).
- Once the permission is repaired, reinstall the DisplayLink drivers.
- If the drivers do not install, you should replace the M/Connect dock.
5
Repairing disk permissions with Disk Utility:
In OS X 10.10.x or later:
• Disk Utility can repair file permissions on a startup disk.
• Permissions are file settings that affect the ability to read, write, or execute the file. If a file's permissions are no longer set correctly, software that uses the file might not work correctly. You can see a file's permissions on the Sharing & Permission section of its Get Info window.
• Important Note: Beginning with OS X El Capitan (10.11.x), system file permissions are automatically protected. It's no longer necessary to verify or repair permissions with Disk Utility.
Follow these steps in OS X Yosemite (10.10.x) or earlier:
• Go to your Applications folder > Utilities > Disk Utility.
• Select the startup disk from the list of volumes.
• Click the First-Aid tab to check permissions. Click Verify Disk Permissions. To repair permissions, click Repair Disk Permissions.
Disk Utility checks a file's permissions only if the file has a corresponding receipt in /var/db/receipt. The receipt tells Disk Utility what the permissions should be. Not all installers include a receipt with the files they install (to check a system folder, open Finder and select "Go" from the menu and enter the directory that you wish to show, such as /var/db/receipts).
Mac OS 10.15.x Specific Issue Troubleshooting
1
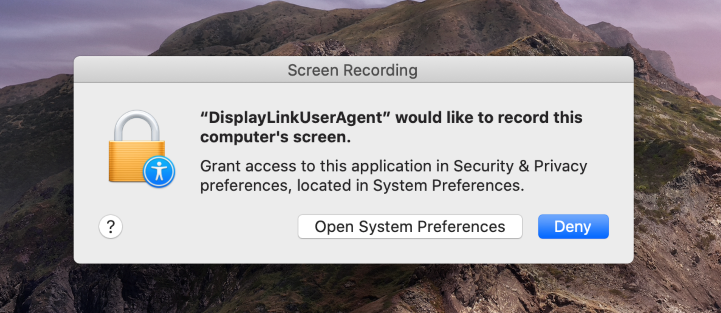
Mac OS Catalina 10.15.x requires "Screen Recording Permission" for DisplayLink devices to work properly. The screen is not actually being recorded by DisplayLink. Approving this enables the driver to access the pixels it needs to render mirrored or extended screens and send the pixels over USB from your computer to the DisplayLink display. It does not send any data or pixel back to DisplayLink.
2
To approve the permission, please follow these steps:
- Download and install the latest DisplayLink Mac OS release for 10.15.
- Reboot your system.
- Open System Preferences.
- Go to Security & Privacy.
- Go to Privacy.
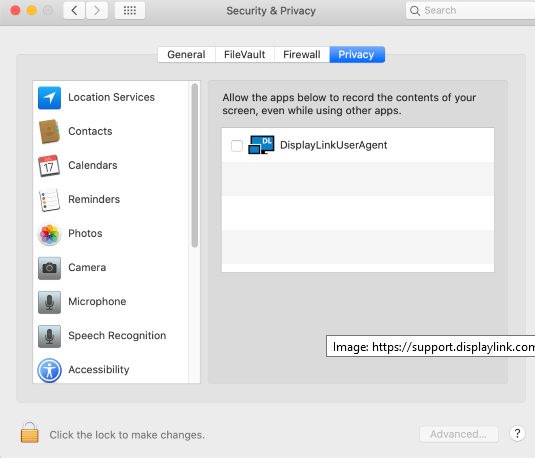
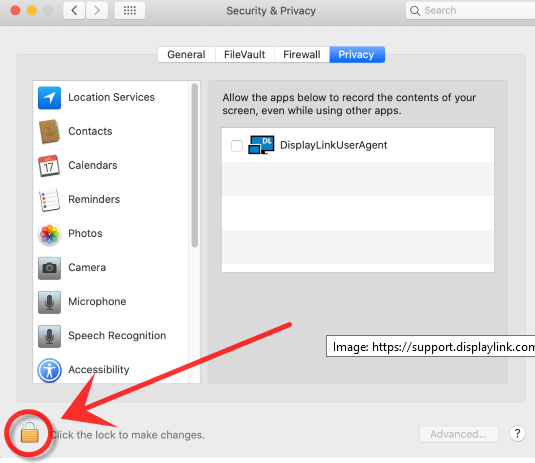
6. Select Click on the lock to make changes at the bottom left of the screen:
7. Authenticate the changes by using your login details.
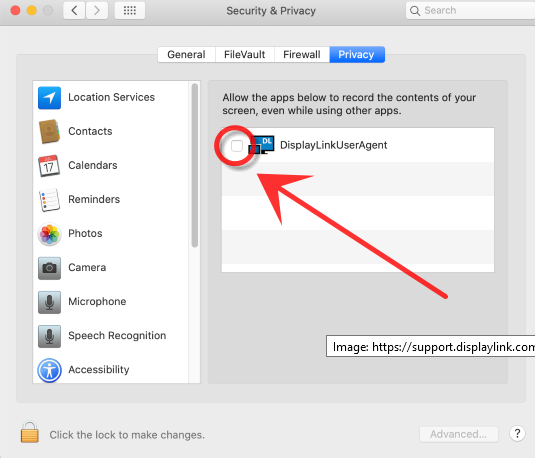
8. Check the box next to DisplayLinkUserAgent:
9. Click on the lock again to save changes.
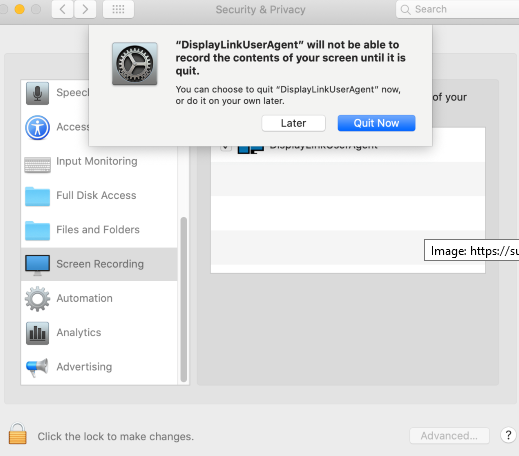
10. A window prompt will open: ""DisplayLinkUserAgent" will not be able to record the contents of your screen until it is quit. You can choose to quit "DisplayLinkUserAgent" now, or do it on your own later." Click Quit Now.
A reboot may be necessary with an older version of the driver.
Mac OS 10.13, 10.14, and 10.15: Video Functionality Not Enabled
Mac OS High Sierra 10.13 (operating system) applies a strict security policy to software that requires kernel extensions (kexts). The DisplayLink driver installation includes a system extension (DisplayLinkDriver, kext) that is affected by this policy.
This results in the user now having to explicitly enable this system extension in the Security & Privacy system preference after installation and before the DisplayLink software can run.
Check if the DisplayLink Kext is blocked.
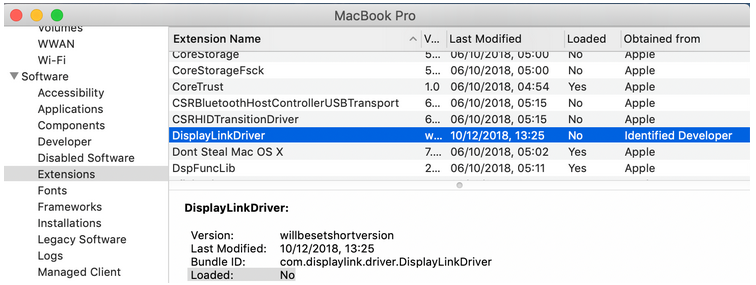
You can check if the DisplayLink Kext is blocked by opening the System Report (Apple Menu > System Report) and select Extensions on the left pane and look for "DisplayLinkDriver." Check the "Loaded" column. See the screen to the right, which shows the kext blocked.
If this is set to "No" then the kext is blocked and needs to be enabled following the steps below.
Enabling the DisplayLink Kext.
*Note: It's only possible to enable the system extension in the 30 minutes following the installation. A new installation can be run to reset the timer.
At the end of the installation, the operating system should display a System Extension Blocked after installation warning and ask the user to enable the DisplayLink extension.
*Important: This warning is not always shown. Even if it is not shown, for new installations, the user must enable the kernel extension to use the DisplayLink product.
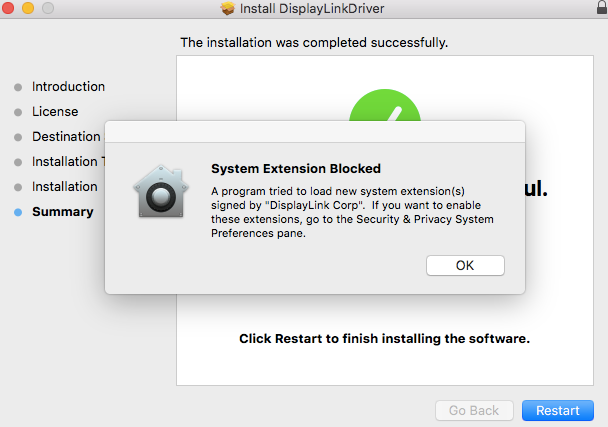
The setting is available by choosing System Preferences from the Apple Menu or by clicking on the gear icon in your Apple Dock and then clicking on the Security & Privacy panel.
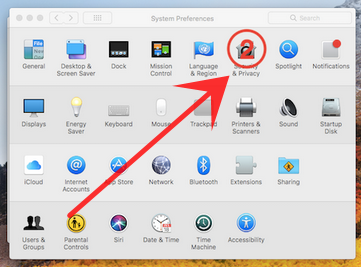
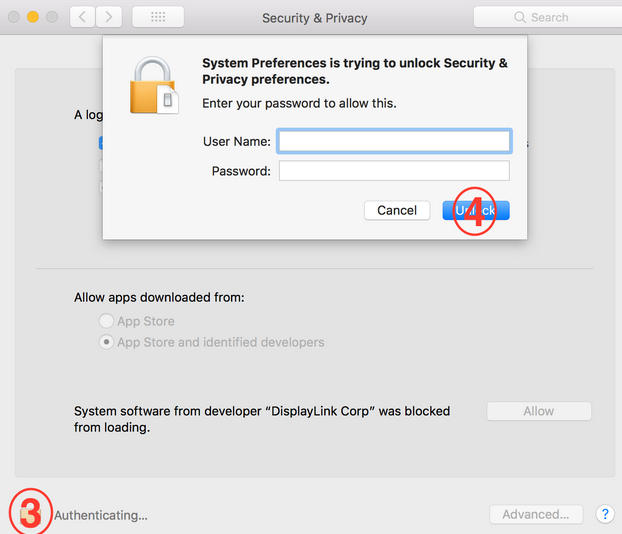
To enable the DisplayLink Software to run on the system, see screenshots to the right:
* Please note that the interface presented may be different if multiple software installations require user authorization.
Follow the prompts here to enter your User Name and Password, then click on Unlock.
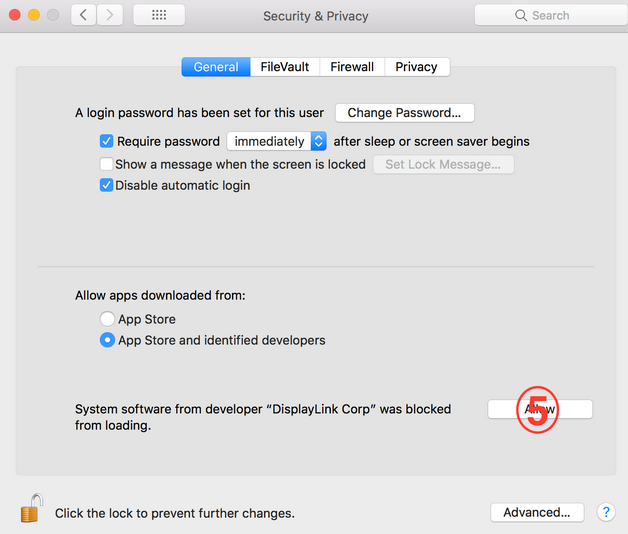
Once you are in, click on the General tab.
Follow the settings in the screenshot to the right.
Near the bottom, at "System software from developer "DisplayLink Corp" was blocked from loading," click on the button to the right that says "Allow."
Occasionally, the System Extension Blocked popup may not be displayed. Additionally, there is also the possibility that after the installation and reboot of the DisplayLink, additional monitors might not be functional. To resolve this, it is required that you manually allow the DisplayLink driver to be loaded on the system by completing the previous steps and rebooting the system at the end.
Notes:
• On some systems, the security clearance may not automatically take effect and the DisplayLink Software will still not be functional after rebooting. In this case, simply run the installer process again to ensure all the software is correctly started. This issue has been raised by DisplayLink to Apple with bug ID 33133825.
• Once the user approval has been granted, following installations of the DisplayLink software will not require further approval. This also means that systems upgraded to High Sierra while the DisplayLink software was installed won't require authentication.